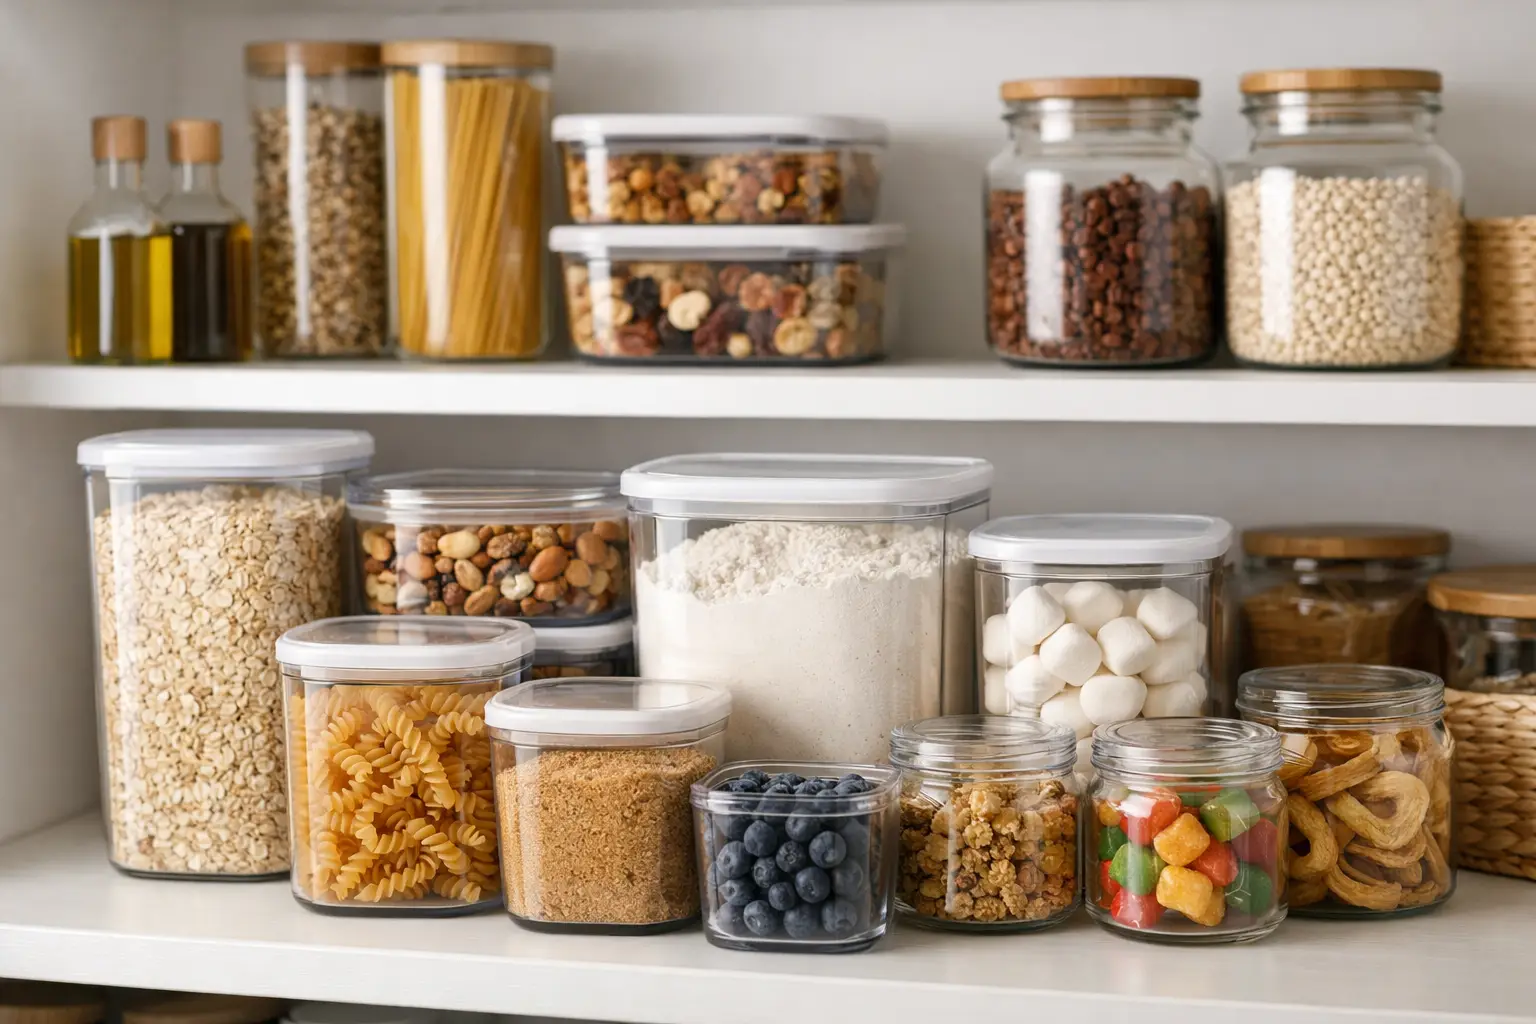
A pantry can look perfectly fine until dinner is 20 minutes away and the rice is buried behind three half-open bags of snacks. The best pantry storage containers solve that everyday problem by making staples easier to see, pour, store, and replace. They are not about creating a picture-perfect shelf for one afternoon. They are about making busy weekday cooking and grocery restocking feel less chaotic.
The right setup depends on what your household actually eats. A family that buys cereal, pasta, and snacks in bulk needs a different mix than a two-person home that keeps baking supplies and coffee stocked. Start with the foods you reach for most, then choose containers that make those routines easier.
A good container does more than hide a package. It protects food from humidity, crumbs, and accidental spills while using shelf space more efficiently. Clear sides are especially useful because they let you spot low supplies before a recipe turns into an extra store run.
Airtight lids matter most for dry goods that lose freshness quickly, including flour, sugar, coffee, cereal, crackers, and pet treats. Look for a lid that closes securely without requiring a wrestling match every time you make breakfast. A silicone gasket can help create a tighter seal, but the lid should still be easy enough for everyone in the house to open and close properly.
Shape is just as important as the seal. Square and rectangular containers usually use shelf space better than round jars, particularly in narrow cabinets. Straight sides also make stacking simpler. If your pantry shelves are shallow, choose containers with a smaller front-to-back footprint rather than oversized bins that leave no room to see what is behind them.
Capacity deserves a little planning. Buying the biggest container available can lead to stale food and bulky shelves. For most homes, medium containers are the workhorses: large enough for pasta, oats, and snack refills, but still easy to lift down with one hand. Reserve extra-large sizes for foods you buy and use often.
There is no single best material for every pantry. Plastic, glass, and open bins each have strengths, and a practical pantry often uses all three.
Clear food-storage plastic is lightweight, durable, and easy to stack. It is a smart choice for cereal, rice, beans, flour, sugar, trail mix, and baking ingredients. A container with a wide opening makes scooping easier, while a flip-top or pour spout can make quick morning routines more convenient.
For families with kids, lightweight plastic is often easier to handle than glass. Just check that it is designed for food storage and choose a quality material that resists stains and lingering odors. Very thin plastic can crack at the corners or warp over time, so it may cost less upfront but can be frustrating to replace.
Glass is a great fit for coffee beans, loose tea, nuts, dried fruit, spices, and ingredients that deserve a clear view. It does not absorb odors, and it can feel especially polished on open shelving. Wide-mouth glass jars are also easy to wash and refill.
The trade-off is weight. Glass is less practical for a high shelf, a crowded cabinet, or a home with energetic little helpers. Use it where visibility and a clean look matter most, but do not feel pressured to turn every bag of pasta into a glass-jar project.
Not everything belongs in an airtight container. Open bins are the low-effort heroes for granola bars, seasoning packets, sauce mixes, snack bags, juice pouches, and baking decorations. They keep small items from spreading across the shelf while letting you grab what you need quickly.
Choose bins with handles if they will sit above eye level. A simple pull-forward bin is much easier than reaching into the back of a deep shelf and knocking over five boxes. For a more orderly look, group bins by routine rather than by product type: lunchbox snacks, taco night, breakfast extras, or baking day.
Before ordering a large matching set, take a quick inventory. You do not need to organize every item at once. Focus first on the categories that create the most clutter or waste.
Start with baking staples, grains and pasta, breakfast foods, snacks, and frequently used cooking ingredients. These categories tend to come in crinkly packaging that is difficult to stack and easy to forget. Once they are contained, the pantry usually feels more functional right away.
A useful rule is to keep foods in their original packaging only when the package already works well. Canned goods, unopened jars, boxed broth, and individually wrapped items often do not need decanting. Transfer foods when the original bag tears, does not reseal well, takes up too much room, or makes it difficult to see how much is left.
For a first refresh, these container types cover most needs:
Matching every piece is optional. A coordinated set can make shelves look calm, but a mix of practical containers often works better. Shop smart by prioritizing lids that seal well, shapes that fit your shelf depth, and sizes that match your grocery habits.
This step is not glamorous, but it prevents the most common pantry-storage disappointment: containers that look great online and do not fit under the shelf above them. Measure shelf height, depth, and width. Then leave a little room for lifting lids, pulling bins forward, and reaching around taller items.
Pay special attention to tall containers. A lid may add an inch or more, and some flip-top designs need clearance to open. If you are working with adjustable shelving, consider creating one tall zone for cereal and pasta containers and one shorter zone for jars, cans, and bins.
Also measure the foods you want to transfer. A container can be attractive and airtight yet still hold only three-quarters of a standard bag. That is not always a dealbreaker, but it means you may have a leftover bag taking up space elsewhere. If you buy bulk items, choose capacities that hold a full refill comfortably.
Labels are what turn a tidy reset into a system that lasts. They help everyone put items back in the right place and make similar-looking ingredients much less risky. Flour and powdered sugar are not a fun mix-up when you are halfway through baking.
Keep labels simple and easy to read from the front. Include the item name, and add a use-by date if you transfer food from a package with a printed expiration date. For staples you refill frequently, a reusable label or erasable marker can be more convenient than creating a new label each time.
If you have allergies in the household, clear labeling becomes even more helpful. Keep allergen-friendly snacks and specialty foods in their own labeled bin so they are easy to find and less likely to get mixed in with everyday items.
Wash and fully dry containers before adding food. Even a little moisture can shorten the life of dry goods, especially flour, cereal, and grains. Use a clean scoop for ingredients that are not meant to be poured, and avoid returning unused food to a container after it has been sitting out during prep.
When you refill, use the older food first. You can pour new food behind or underneath the existing supply, or empty and wash the container before adding a new bag if it is practical for your routine. This small habit helps reduce forgotten food at the bottom of the pantry.
A monthly five-minute check is usually enough. Wipe crumbs, toss expired items, and take note of what is running low. That is the real advantage of clear, well-sized containers: your pantry starts helping you shop and cook with less guesswork.
A better pantry does not require a complete makeover or a cabinet full of identical jars. Start with one shelf, choose containers that earn their space, and build from there. The goal is simple: when you open the door, the next meal should feel easier to make.
If you want to learn more about food‑storage container safety, including materials, temperature limits, and approved uses, visit the eCFR site.












Leave a comment